
Cuisine & Beverages
Wine Bottle Size Guide - How Many Ounces Are in a Bottle of Wine
Curious about how many ounces are in a bottle of wine? This guide breaks down common bottle sizes, t...
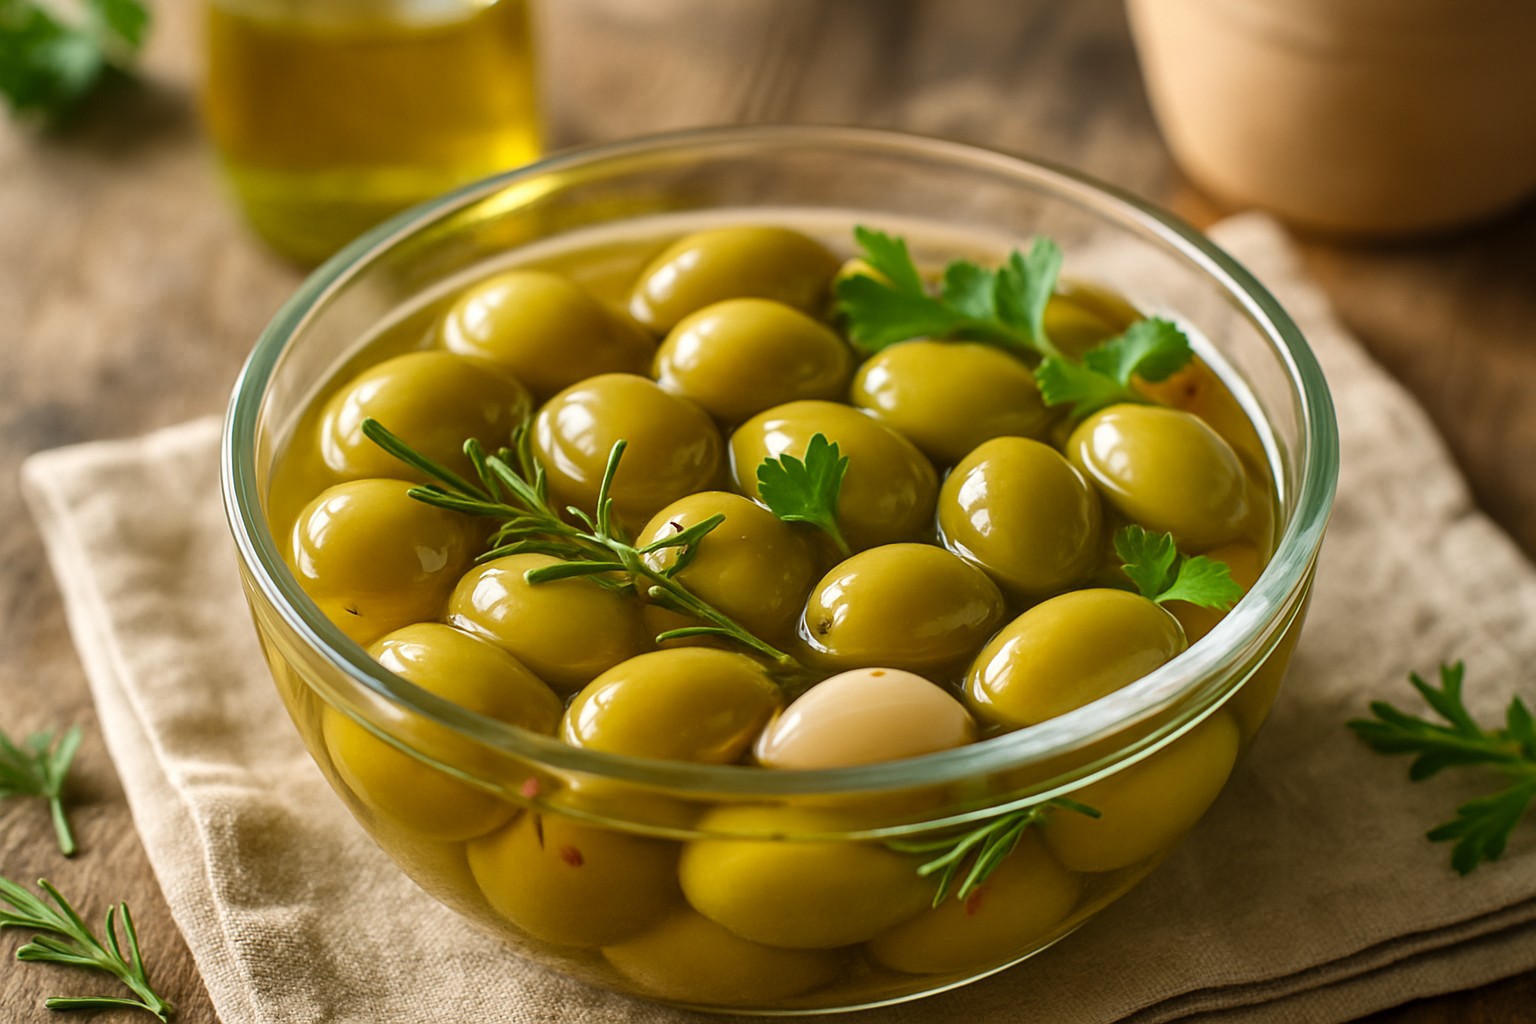
Curing olives with lye is an age-old trick that swiftly banishes the natural bitterness, making those olives good to go in just a few weeks rather than dragging things out for several months. Unlike the slow-and-steady natural curing, lye curing fast-tracks the process while still holding onto the olive's texture and flavor like a champ.
Lye, also known as sodium hydroxide, breaks down bitter oleuropeins in olives and speeds up the curing process. This trick often slashes the curing time from several months down to just days or a few weeks and gives you a serious head start.
Kick off curing olives with lye using fresh or slightly underripe ones like Manzanilla or Kalamata that handle this method well. You’ll need sodium hydroxide, also called food-grade lye powder, so don’t mix it with anything else. Make sure you have plenty of clean water for rinses and large non-reactive containers like food-grade plastic tubs or glass jars because no one wants a chemical reaction surprise. Safety first: gloves and goggles are a must.
| Material/Tool | Purpose | Safety Tips or Alternatives |
|---|---|---|
| Fresh olives | The star of the show that needs curing | Go for firm olives without any pesky bruises |
| Food-grade lye | The magic chemical to zap bitterness from olives through a clever process | Always suit up with gloves and goggles, and make sure your workspace is well-ventilated – safety first! |
| Large plastic/glass containers | Perfect for safely soaking and rinsing those olives | Steer clear of metal containers since they’re troublemakers and react with lye |
| Gloves and goggles | Your best friends to keep skin and eyes safe from lye’s nasty bite | Pick gloves that can take on chemicals without flinching |
| Clean water | Essential for a thorough rinse of olives after the lye bath | Plenty of water is the name of the game—change it often |
| Brining salts (non-iodized) | The secret to that final flavor punch and preserving the olives | Kosher or sea salt usually steals the show |
| Flavorings (optional) | Garlic, herbs, or spices to jazz up the olives’ flavor | Only bring these in after rinsing and brining—patience pays off |
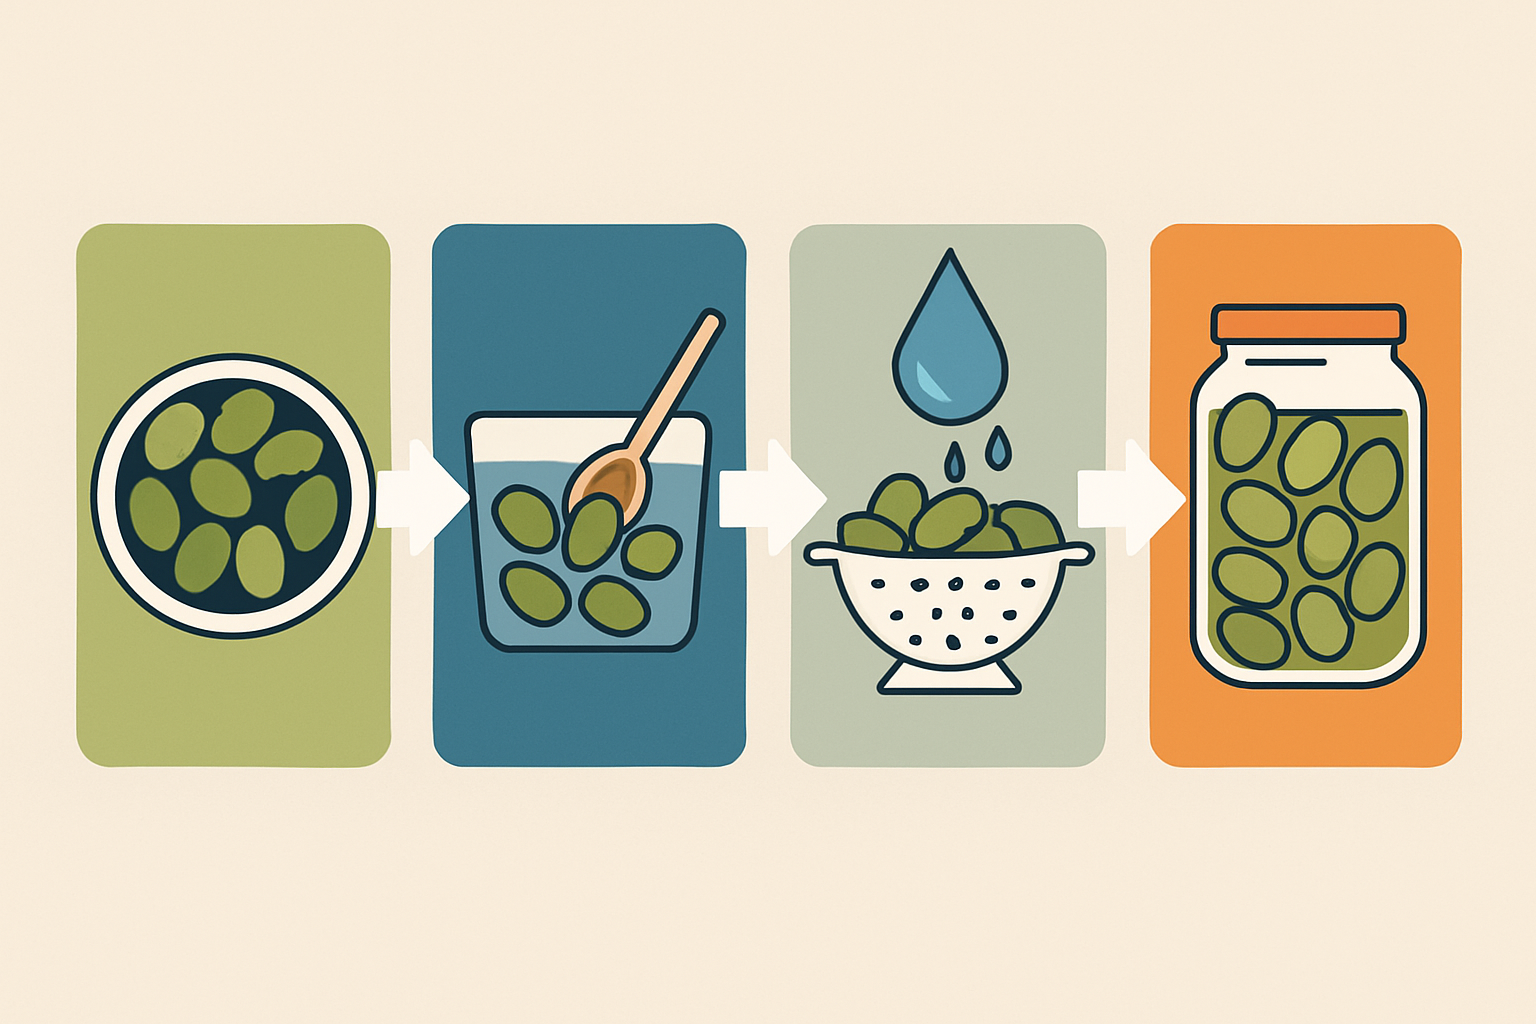
Curing olives with lye is a delicate dance that involves key steps to remove bitterness and preserve those little gems perfectly. The process starts by prepping the olives and the lye solution. Then you soak the olives, rinse them several times, brine them, and if you’re feeling adventurous, add herbs or spices before storing them.
Pick out fresh firm olives that don’t have bruises or mold—those imperfections can really throw off the end result. Set aside any damaged ones because you don’t want spoilage crashing the party. Rinse the olives under cool running water to wash away dirt, dust or bits left from harvesting or packaging.
Mixing lye requires caution—it's no place for shortcuts. Always pour the lye powder into the water, never the other way around to avoid nasty splashes on your skin. Typically, use about 1-2% lye by weight in water but keep in mind this can shift depending on the olive variety and size. Use a container that can handle the heat and stir with a utensil that won’t react—that detail can save you headaches. Gloves, goggles and long sleeves are your best friends here because they protect your skin and eyes from burns nobody wants. Any leftover lye solution should be clearly labeled and stored out of reach—better safe than sorry.
Make sure to completely cover the olives in the lye solution for anywhere between 6 and 12 hours, depending on their size and variety—no shortcuts here. It’s a good idea to check in on them regularly by taking a few out and slicing them open to see if the bitterness is starting to mellow out. When the flesh feels soft and that sharp bitterness has finally eased up, you’re good to go—stop soaking and begin rinsing.
It’s vital to give those olives a good rinse to wash away any lingering lye because it can spoil the batch and is not something you want to mess with on the safety front. Make sure to change the rinse water 3 to 4 times a day and let the olives soak in fresh water for one to two days. Patience definitely pays off here. You can keep an eye on things by tasting them or using pH tests to ensure every trace of lye is gone.
Make a brine by dissolving about 8 to 10 percent salt by weight in water and let the olives soak for 4 to 6 weeks. This ritual usually does wonders for their flavor, texture and shelf life—I’ve found it really brings out the best in them. Feel free to toss in some garlic cloves, dried herbs, lemon peels or chili flakes to give your olives a charming twist that’s uniquely yours.
After curing and adding flavor tuck those olives away in airtight containers. Glass ones are best if you want to dodge any odd or unwanted tastes sneaking in. Keeping them chilled in the fridge does wonders for preserving their charm. They usually stick around nicely for anywhere between 3 and 6 months. If your olives start to look a bit sad—drying out or turning mushy—you can give them a little boost with a saltwater brine to freshen up their texture and flavor.
Visual representation of the lye curing process stages or finished product
Lye curing olives definitely speeds up the process though it’s not without hiccups. Bitterness tends to linger if the olives don’t get soaked long enough—a bit like that stubborn friend who just won’t let go. If there’s leftover lye it can leave a harsh taste or mess with the texture which nobody wants. And if you store them the wrong way spoilage or some off-putting smells might crash the party.

With experience in neuroscience journalism, Vesper makes cutting-edge brain research accessible to general audiences through clear explanations and compelling case studies.
Read ArticlesCurious about how many ounces are in a bottle of wine? This guide breaks down common bottle sizes, t...

Explore the intriguing Water Moccasin shot—from its ingredients to its smooth, fruity flavor. Perfec...
Dive into the costs behind a shot of Patron tequila and see how it stacks up against other premium b...

Unlock the secrets of the perfect affogato coffee cup. Explore design, materials, and temperature co...